
Cold weather camping in your RV is an awesome experience. Picture a quiet forest dusted in snow or crisp, frosty mornings right outside your window. But once the temps really drop, the risk of frozen plumbing becomes pretty real. When pipes freeze up, you can end up with no water, which is a hassle in itself, or worse, deal with cracked pipes and expensive repairs. After spending way too many cold nights stressing about the water lines under my camper, I’ve figured out some proven ways to protect your setup when the weather turns harsh. The goal is to enjoy winter adventures, not play plumber when you least expect it.
Why Frozen Pipes are a Big Deal for RV Campers
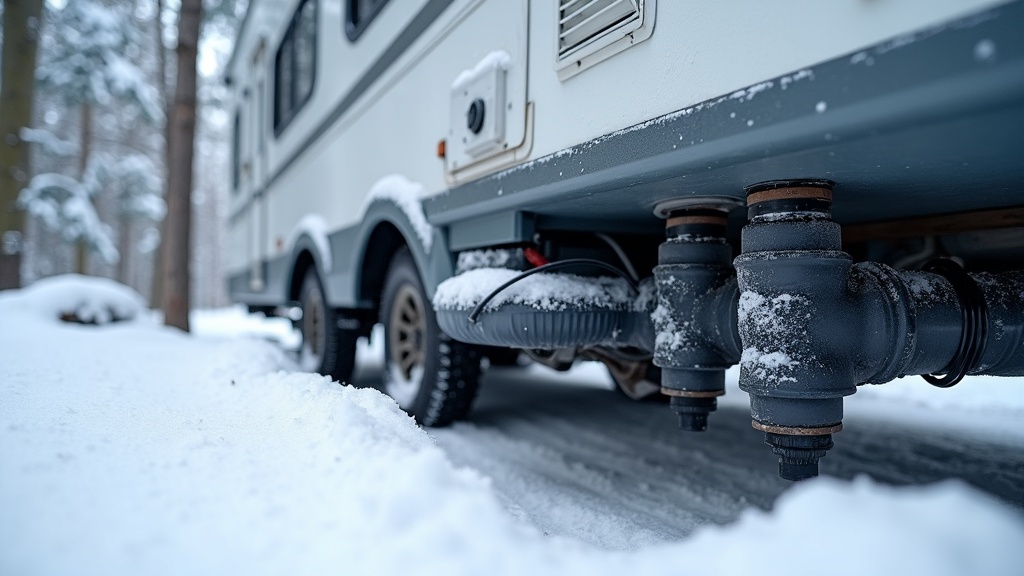
Most RVs just aren’t built to handle deep freezes. Pipes under your rig are often exposed, and holding tanks aren’t always insulated. When temps drop below freezing (32°F/0°C), water sitting in these pipes can turn to ice. As that water expands, it puts pressure on the pipes and fittings, which causes leaks or, if you’re really unlucky, a split pipe. Both fixes are time-consuming and can get pricey, especially if you’re in the middle of a trip.
Most folks learn about frozen pipes the hard way: you wake up to no water flow, or a weird leak pops up after things thaw out. Replacing a pipe or patching a tank is not how anyone wants to spend their camping weekend. Even small splits can cause major headaches if you aren’t ready, so it’s a smart move to set up your rig for cold weather before temperatures nosedive. For longer trips or full-time living, this kind of prep is essential for comfort and peace of mind.
Basic Steps: How to Get Your RV Ready Before Temperatures Drop
A little prep before cold weather hits can go a long way. Here’s how I get my RV ready for chilly nights on the road:
- Know your RV’s plumbing layout: Figure out which pipes run along the exterior and if your tanks are exposed (many are, unless you have a true fourseason model). Walking the length of your RV and checking for water lines will help you spot vulnerable areas.
- Inspect for gaps and leaks: Small cracks or holes in the underbelly let cold air in, freezing pipes fast. Seal them up with spray foam or weatherproof tape. Pay extra attention to small seams and joints that might have shifted over time.
- Test the water heater and tank heaters: If your rig has builtin tank heaters or heating pads, make sure they’re working before you need them. Turn them on and listen or feel for warmth, making sure they’re ready for sustained use.
- Stock up on the right supplies: Picks like pipe insulation, heat tape, and RV antifreeze are all lifesavers in a freeze. It’s also a good idea to keep a toolkit handy for quick fixes in the middle of the night.
Tools and Gear That Make a Difference
I’ve found that a few, fairly affordable products make cold weather camping much less stressful. Here are my favorite gear picks for keeping pipes protected:
- Foam Pipe Insulation: These slip right over your water lines and add a reliable layer of defense against freezing air. You can grab these at most hardware stores; just measure your pipe diameter first for an easy fit. It’s an inexpensive upgrade with real results. For exposed pipes, double layering the foam can give a boost to its effectiveness.
- Heated Water Hose: These plug into shore power and keep water flowing from the spigot to your RV even in bitter cold. Super useful if you want to stay hooked up at a campground during winter. Some new models feature thermostatic control for even more reliability.
- Heat Tape: It’s a cord that runs along your pipes and warms them up when temps get low. There are different types for plastic or metal pipes, so check your RV’s plumbing before buying. Proper installation and following safety guidelines make heat tape a real game changer.
- Underbelly Skirt/Enclosure: RV skirting made from fabric, foam board, or vinyl helps block out wind and holds warmth underneath where most pipes run. It’s especially helpful for longer stays in one spot.
- Tank Heating Pads: If you camp often in freezing temps, stickon electric pads keep your holding tanks a few degrees warmer, preventing them from icing up. Choose a size that matches your tanks and check power requirements before installing.
- RV Antifreeze: You don’t need to run this through all your pipes nightly, but adding it to holding tanks and ptraps keeps those areas from freezing. Remember to choose only nontoxic RV antifreeze labeled safe for potable system parts.
Along with these, it’s wise to carry some extra sealant, gloves, and zip ties for making quick repairs if something breaks loose on a cold night. Having a small electric space heater can also step up your comfort if the main heat source struggles to reach all corners of your rig.
Action Steps: DaybyDay When a Freeze Rolls In
- Disconnect External Water When Not in Use: Even with a heated hose, removing it overnight is a safe bet. Switch to your fresh tank; less exposed water means less to freeze. Always drain the hose and stash it somewhere protected from the cold.
- Keep the Heat On: Set your furnace to at least 50°F. If your rig has a basement, open those cabinet doors to help warm air reach the pipes inside. Don’t forget the bathroom and kitchen areas, since those pipes often run near exterior walls.
- Drip Faucets: Letting faucets drip (even just a trickle) keeps water moving and makes it harder for ice to form. This is especially helpful during sudden cold snaps that arrive late in the night.
- Use Interior Tank Water: Switch over to your onboard water tank at night or when you leave your camper; this keeps the lines from the city connection from turning solid.
- Flush With Antifreeze: Add a little RV antifreeze into your gray and black tanks, plus sink and shower ptraps. This protects those spots from freezing since water often lingers there. A funnel makes pouring antifreeze messfree and efficient.
Common Problems and How to Deal With Them
- Frozen Hose: The water supply hose outside is usually the first thing to freeze. Using a heated hose helps, but if it does freeze, bring it inside to thaw and switch to your internal tank for a while. Don’t try to force water through a frozen hose; thaw it slowly to avoid cracks.
- Blocked Faucet or Pipe: If nothing comes out of your faucet, a section of plumbing may have frozen solid. Turn up the furnace, open all fixtures, and target cold spots with a space heater. Warming things up gently can get water flowing again without causing a burst. Be patient and check all joints for leaks as things thaw to catch issues early.
- Burst Pipe: If you see dripping in the underbelly or a sudden puddle under the rig, you probably have a cracked pipe. Shut off your water, drain the system, and check for splits. Tape and clamps are a quick fix, but permanent repairs might need a pro or a DIY replacement once you thaw things out. Always dry out wet spots quickly to avoid further damage.
Heated Supply Lines: Are They Worth It?
Running a heated freshwater hose is pretty handy for longterm winter camping. These hoses have builtin heat cables and insulation, so water stays liquid all the way from the spigot to your hookup. They use power (usually less than 60 watts), so you’ll want to plug them into a reliable source. Just doublecheck the rating for temps you’ll face and make sure connections at both ends are protected with insulation or a foam box to cut down on cold air leaks. Investing in a quality heated hose pays off if you do a lot of cold weather camping, especially when temperatures stay below freezing for days. Some campers add a layer of pipe insulation or wrap the fitting with a towel for extra peace of mind.
Thawing Out Frozen Plumbing Safely
If parts of your system freeze, avoid using open flames or boiling water. You might melt parts of your RV or damage fittings. Small amounts of heat (like a hair dryer, heated blanket, or a low wattage space heater) pointed at the problem spots can slowly get things moving again. It can take a while, but it’s less risky than trying to blast things with too much heat all at once. Once thawed, check carefully for leaks. Sometimes a fitting will only start dripping after the ice has thawed out. Take your time, and keep towels handy for quick cleanups. Consistent monitoring also prevents refreezing after your pipes are thawed.
RealWorld Tips from Cold Weather RVers
After plenty of trial and error, and a few frozen water disasters, I’ve picked up some practical tricks from seasoned campers and fellow travelers:
- Insulate the entry point: Where your water hose connects to the rig is often the weak spot. Wrapping it with pipe insulation or a DIY insulated pouch makes a difference. Even a makeshift foam sleeve and duct tape can save you in a pinch.
- Keep the furnace intake clear: If it’s blocked by snow, your main heating source might quit. Brush it off regularly in deep snow. Clearing exhaust vents and inlets allows your furnace to work its best, so check often in blizzard conditions.
- Portable dehumidifiers help: Less moisture inside means less frost working its way into every crevice. Dry air cuts down on condensation, which can freeze in unexpected places inside your walls and drawers.
- Access panel tip: If the forecast calls for a real cold snap, popping off the access panel during the day to let heat in can keep pipes warmer. Close it up again once temps stabilize to lock in retained heat for the evening.
- Skirting hacks: Even thick foam insulation board or hay bales can serve as temporary skirting if you’re parked for a week or more. Be careful to create an entry point so varmints don’t make a cozy home under your camper.
Additionally, wearing insulated boots and gloves while working on your setup can make the process more comfortable during those icy mornings. It’s the little tweaks and daily habits that keep your water flowing while others are struggling with frozen lines. Simple routines, such as opening cabinet doors near exterior walls, make a noticeable difference in pipe temperature.
Frequently Asked Questions about Frozen RV Pipes
Here are a few things I get asked all the time on the road:
Question: Can I camp in the winter without any pipe insulation?
Answer: You might get by in mild temps, but once it dips below freezing at night, your risk for frozen plumbing goes way up. Even foam insulation or DIY solutions can provide a real buffer against cold air. It’s low cost and easy to put in place, so there’s no good reason to skip it when winter camping.
Question: Should I leave my water hose hooked up at a winter campground?
Answer: It’s safer to fill your internal fresh tank, then disconnect and stash the hose. Only hook up to refill, since external hoses freeze way faster than internal lines. Keeping hoses inside when not in use also extends their life and helps avoid midnight mishaps.
Question: What’s the lowest temperature I can camp in before things start to freeze?
Answer: Any time temps are below 32°F (0°C) overnight, pipes and hoses are at risk. Some RVs handle a light freeze with no problem, but for longer cold snaps, getting proactive is super important. Checking weather forecasts often and reviewing your specific RV model’s cold tolerance can help you plan stays without disaster.
Question: Does RV antifreeze go in the fresh water lines?
Answer: No, you only want nontoxic RV antifreeze in the drain lines, tanks, and ptraps. Don’t run it through the lines you drink from unless you’re winterizing the whole system for storage. If you do winterize with antifreeze, be sure to flush it out thoroughly before drinking or cooking with the water again.
Best Practices for Staying Warm and Dry All Season Long
Maintaining your RV and prepping for cold is an ongoing process, but with the right steps, frozen pipes don’t have to wreck your winter camping plans. I always recommend keeping backup supplies like extra pipe insulation, sealant, or emergency heat tape so you can adjust your setup if the weather turns colder. Checking and rechecking vulnerable spots, especially after heavy wind or snow, definitely helps keep surprises to a minimum.
Choosing campsites with wind protection, sunny exposures, or full hookups makes things easier too. I check campground reviews for winter experiences, ask fellow campers for recommendations, and always pay extra attention to the forecast during freezing weeks. Camping in cold weather can be seriously fun if you’re prepared, and not stuck poking around with frozen pipes in the dark. Planning ahead and taking a few simple precautions means you get the most out of your chilly time in the great outdoors—without any unwelcome plumbing surprises.
If you’re dreaming of scenic snowy campsites and crisp morning hikes, winter RV camping is totally within reach. All it takes is a bit of knowhow, some solid gear, and a plan to tackle Mother Nature’s coldest curveballs. With these tricks in your back pocket, you’ll be relaxing by the fire in your cozy rig while others are playing catchup. Stay warm, stay safe, and above all, enjoy every minute of your cold weather camping adventure.