
Managing the black tank in your RV is one of those chores that every camper eventually faces. Knowing how to properly dump your black tank not only keeps things running smoothly but also saves you from a lot of unpleasant surprises down the road. I’m sharing everything I’ve learned so you can approach this task with confidence and maybe even a little bit of pride in a job well done.
What Exactly is the Black Tank?
RV plumbing can look a little intimidating at first, but it’s really more practical than it seems. The black tank is simply your RV’s waste holding tank. It collects everything from your toilet — liquid and solid waste, plus water. This is different from your gray tank, which catches water from your sinks and shower. Keeping the black tank clean and functional is really important for every trip.
The whole process sounds like it could get messy, but with a little knowledge and a good routine, you’ll have it under control. You just need the right tools and a few straightforward steps. It can even be something you do mindlessly once you’ve built a routine.
Tools and Gear for Dumping Your Black Tank
Having the right gear makes this task way easier. There are a few key items I always bring along so I don’t get stuck or make a mess:
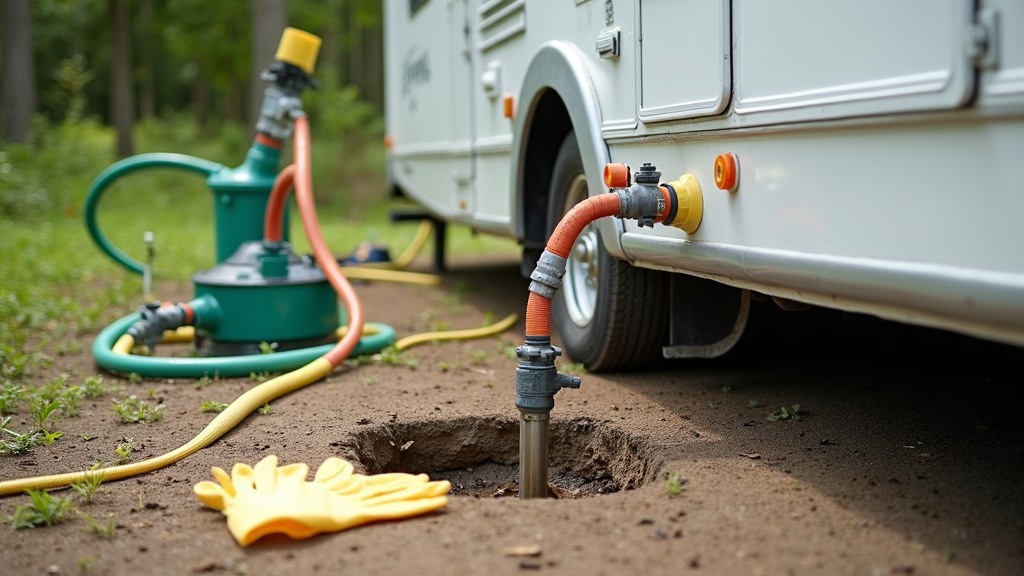
- Sewer Hose: This thick, flexible hose attaches your RV outlet to the sewer drain. I recommend a dedicated, heavyduty model. Some even have clear connectors so you can watch for clean water during rinsing.
- Disposable Gloves: Trust me, you’ll want to use gloves, no matter how careful you are. A big box of nitrile gloves stays in my storage bay.
- Sewer Hose Support: These little cradles keep your hose off the ground and angled for proper drainage. Makes the flow smoother and keeps things clean.
- Tank Rinser or Flush Wand: Many newer RVs include a black tank flush port, but you can get a tank rinser wand if yours doesn’t. This helps clear out stuck debris and toilet paper.
- Sewer Adapter: Campground sewer connections come in different sizes and shapes, so a universal adapter comes in handy for securing the hose tightly.
- Dedicated Water Hose: This isn’t the same hose you use for drinking water! It’s only for rinsing, usually bright orange or black so you don’t mix them up.
- NonScented Tank Treatment: These products break down waste and help with odor. There’s quite a range, so try a few to see what works for you.
With these essentials, you’re prepared for just about anything that can happen at a dump station. Keeping all your supplies together in a designated tote makes the process smoother. It also helps to run through a quick checklist before each trip so nothing’s left behind. Being prepared saves time and frustration once you arrive at a campground.
StepbyStep Guide to Dumping Your Black Tank
Here’s a walkthrough that’s kept my trips stressfree and mostly messfree. I recommend following these steps in order; consistency is what makes this job simple.
- Gear Up: Slip on gloves before you even open your sewer bay. Have all your tools at hand, so you’re not scrambling in the middle of the process.
- Connect the Sewer Hose: Attach one end to your RV’s waste outlet and the other firmly into the dump station inlet (using your adapter if needed). Double check both ends are secure.
- Use a Support Ramp: Place your sewer hose support from the outlet to the drain, sloping downward for good flow. This avoids standing waste and keeps your hose out of the muck.
- Open the BLACK Tank Valve First: Slowly pull the black tank valve and let it drain. Listen for it to finish; it can take a couple of minutes. Don’t open your gray tank yet.
- Flush or Rinse the Black Tank: If you have a black tank flush system, connect your dedicated rinse hose and flush according to your RV manual. Otherwise, use a tank rinser wand through the toilet. Watch the clear section in your hose, and repeat until the water runs mostly clear.
- Close Black Valve, Open GRAY Valve: Once the black tank is done, close the black valve. Then open the gray tank. This lets any soap and shower water clean your hose out from the inside.
- Finish and Rinse Hose: Once everything’s drained, close both valves. Disconnect the hose from your RV (start from the RV side), and rinse it well with your dedicated hose. Drain and stow the hose, letting gravity run out any last drops.
- Add Treatment and Water: Drop in a tank treatment pod or pour in liquid, and add a few gallons of water to the empty black tank to prevent dry buildup when you hit the road.
- Clean Up: Toss your gloves, sanitize your hands, and wipe down any surfaces that got splashed. I keep a spray bottle of disinfectant handy for this part.
Following this process every time keeps smells down and parts working the way they should. Skipping steps usually brings headaches later, so a good routine really pays off. Experienced RVers sometimes add their own tweaks to this process. For instance, some like to do a “double rinse” if the tank was especially full.
Common Mistakes and How to Avoid Them
I’ve learned a few lessons the hard way, and most people I know have too. Here are a few slipups worth avoiding:
- Dumping Too Early: Wait until your black tank is at least 2/3 full before dumping. The extra liquid helps push out solids and prevents clogs.
- Leaving the Black Valve Open While Camped: This can let liquid waste drain and leave solids behind, causing nasty buildups. Keep it closed, and only dump when the tank is nearly full.
- Using Too Little Water: Always use plenty of water with each flush. Water helps move waste through the system and keeps your tank sensors clean.
- Mixing Up Hoses: Clearly label or color code your fresh, gray, and black tank hoses to keep them separate. Crosscontamination leads to health risks and stinky surprises.
- Rushing the Rinse: Taking a minute or two extra to rinse your tank and hose saves you from blockages and equipment issues down the road.
Another mistake is using harsh cleaners; always stick to products made for RV tanks. Careless dumping or not checking connections can cause leaks or spills, so slow down and check everything twice.
Extra Tips for Odor Control and Tank Health
No one wants to deal with smells in their RV. Here are a few habits I rely on for a fresher black tank and an easier dumping routine:
- Consistent Tank Treatments: Dropin pods or liquid tank treatments help break down solids and prevent odors. Stick with one that works well, and use it every time you dump. I look for products that are both septicsafe and RVspecific.
- Limit What Goes Down: Use only RVfriendly toilet paper, and don’t flush wipes, paper towels, feminine products, or foreign objects. The black tank isn’t a trash can; it’s just meant for waste and the right paper.
- Keep Water Levels High: When your tank is empty, always add some water. NEVER leave it dry; this will turn waste to stone and create all sorts of problems for sensors and valves.
- Regular FullTank Flushes: Every few dumps, do a bigger flush. Fill the black tank with fresh water (using your flush system or a few buckets through the toilet), then dump again so you get every last bit out.
Opening windows and vents during and after dumping helps keep odors out of the RV. If you’re staying in one place for a while, doing occasional deep cleans is smart.
What to Watch Out For: Troubleshooting and Prevention
Problems with the black tank can stop your trip cold. Most issues are easy to avoid with a little care and observation:
- Sensor Trouble: If your tank sensors always show “full,” they’re probably gunked up. Use a tank cleaner (there are special brands for this) or try the ice cube trick — dump a bag of crushed ice in, drive for an hour, and let the movement scrub them clean.
- Clogs: Too little water, the wrong toilet paper, or leaving the valve open are common causes. Avoid them with plenty of water and proper dumping practices.
- Leaks or Smells: Always double check for leaks in your hose and connections before and after dumping. If you notice a persistent smell, inspect the tank vent up top; birds or debris sometimes block it. Unblock it carefully, or have a pro handle it if you’re unsure.
- Frozen Tanks: In cold weather, black tanks can freeze and create headaches. Use holding tank heaters or dump before cold snaps to avoid freezing waste.
If clogs have you stuck, stop immediately and don’t keep flushing or forcing the valve. Take time to break up the blockage with proper tools and care to avoid worse problems. Prevention is always better than repairs.
FAQs: Black Tank Dumping Questions Answered
I pulled together some common questions that come up, especially among newer RVers or those switching from tent camping:
How often should I dump my black tank?
Wait until the tank is at least 2/3 full, or once a week if you haven’t filled it. This helps keep things flowing and makes rinsing more effective.
What if my campground doesn’t have a sewer hookup?
Some campgrounds offer a dump station near the entrance or exit. Use it before you settle in or before you leave. If boondocking, look for public RV dumps on apps or campground websites. Gas stations, rest stops, and truck stops sometimes offer these too (sometimes for a small fee).
Can I use household toilet chemicals or bleach in my tank?
Stick to RV or marine tank treatments. Household bleach and drain cleaners can damage seals and tank sensors, and some aren’t good for septic systems or the environment. Products designed for RV tanks break down waste effectively without causing damage.
Why does my tank still smell after dumping and rinsing?
It could be a clogged vent pipe, dry tank (no water added after dumping), buildup on tank walls, or a driedout toilet seal. Check these spots and refresh your treatment routine.
Is it safe to dump at home?
Some RVers dump into septic cleanouts, but most municipal systems aren’t meant for RV waste. Check local rules before doing this. If allowed, use gloves and rinse thoroughly afterward. Many cities have restrictions, so it’s best to use official dump stations when possible.
What should I do if my black tank valve won’t open?
If the handle feels stuck, don’t force it. Try gently rocking it while having someone push or pull the hose with care; if it’s still jammed, it might be waste solidified around the valve or a mechanical fault. You may need a professional service tech to take a look. Keeping up with regular rinsing helps prevent jammed valves.
Black Tank Care for Smooth Travels
Keeping up with regular black tank maintenance isn’t flashy, but it’s one of those things that makes RV life comfortable and stressfree. Practice these routines every time you dump, and you’ll avoid nearly all of the usual headaches. Proper tank care isn’t complicated. It’s just another part of RVing that gets easier (and cleaner) every time you do it.
Whether you’re just starting out or want to improve your dumping routine, a bit of prep and the right habits make all the difference. It’s worth checking your setup each trip and adjusting your routine if you find a trick that works better for you or your RV model.
RV waste may not be the prettiest part of the adventure, but it’s one you can easily master. Your tank (and nose) will thank you!